CEA-List develops non-destructive testing (NDT) methods for the inspection of parts made by additive manufacturing, including an ultrasonic wave process for the internal inspection of very large parts that was used to validate the compliance of ship propellers manufactured by Ramlab.
The additive manufacturing (AM) of metal parts involves stacking metal alloy layers or wires that are fused together at very high temperatures. Innovative AM processes can be used to manufacture small and very small runs of parts (replacement parts, parts for the aeronautics and maritime industries, parts for space) and parts with complex geometries (like molds).
The materials resulting from AM processes are new and their structural, physical, and chemical properties are not yet well understood. Parts made by additive manufacturing are also likely to have inclusions, cracks, porosities, and other internal micro-defects that must be detected to ensure the parts’ structural integrity.
Despite its potential, in certain industries, additive manufacturing is facing a major hurdle: a lack of inspection methods. Without suitable inspection methods, processes cannot be certified, and the compliance of the parts manufactured cannot be assured, either when they come off the production line or later on in their lifecycle.

CEA-List has substantial expertise in non-destructive testing (NDT). We are investigating how ultrasound, laser ultrasound, X-ray radiography and tomography, gamma radiography, eddy current, and other conventional NDT techniques can be used on parts made by additive manufacturing. Our goal is to develop methods that can be used to conduct internal and external inspections of parts of all sizes, regardless of AM process.
For example, we are studying how eddy current inspection (an electromagnetic technique) can be used to carry out surface and sub-surface inspections of metal parts. For parts with complex geometries, we are mainly focusing on X-ray tomography, which can “see” a part’s internal and external structures and measurements (internal channels, defects). The technique is very accurate for parts whose dimensions, including the total thickness of the material to “see through,” are compatible with standard tomography energy levels.
For large and very thick parts, ultrasonic wave inspection, which offers better penetration of material, is the preferred method. Inspection is completed in immersion or, if the surface state of the part allows, by moving a probe directly across the part’s surface.
CEA-List is also using its CIVA software suite to confirm the feasibility of the new inspection techniques developed.
The tools in the CIVA software suite are also being used to process measurement data and to characterize the defects detected, providing information on their dimensions and nature, for example. Better process control can then be achieved by correlating the characteristics of the defects with the additive manufacturing process parameters used. This will also facilitate certification by helping determine the process parameter thresholds in order for a part to be compliant. We are also tackling an even bigger challenge: to monitor part health and critical process parameters in line so that they can be corrected in real time for defect-free parts right off the production line.
Metal parts made by additive manufacturing:
Non-destructive testing (NDT) techniques
Ramlab is a Rotterdam-based additive manufacturing company specializing in metal parts for the maritime industry. The company, which wanted to certify an inspection process for propellers made using WAAM (wire arc additive manufacturing), partnered with CEA-List on a feasibility study.
CEA-List developed an ultrasonic inspection method—the only method suitable for the sub-surface inspection of such large parts.
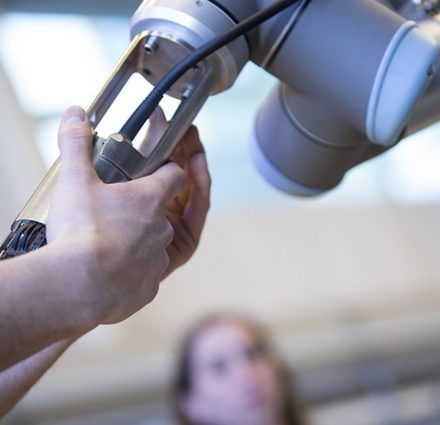
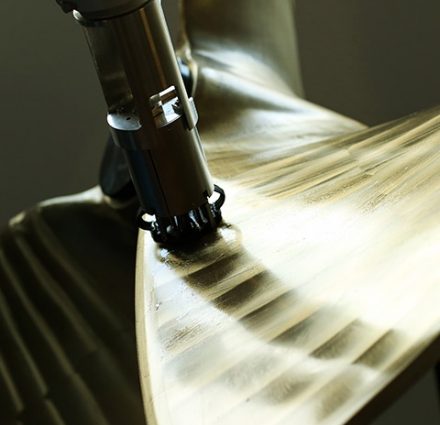
After the WAAM process, each propeller is carefully machined to achieve the target dimensions and hydrodynamic properties. Because the machining process leaves a high-quality polished surface, a specially-designed flexible shoe probe was used directly on the part. This type of probe enables optimal transmission of the ultrasonic waves through the material, so higher frequencies (around 10 MHz) can be used, resulting in images with the desired degree of precision. Defects measuring around a half a millimeter were successfully detected.
The process is fully automated. A six-axis robot moves the probe over the part’s complex-shaped surface, ensuring complete inspection coverage.
CEA-List used its CIVA simulation software to optimize the development work completed for Ramlab. CIVA was also used to process the data on the defects observed during inspection in order to characterize them.

Our work with CEA-List and their innovative non-destructive testing technology gave us valuable new insights into our WAAMpeller.
CEA-List is engaged in several EU projects on additive manufacturing.
These EU projects are rounded out by several AM projects financed by the French government: